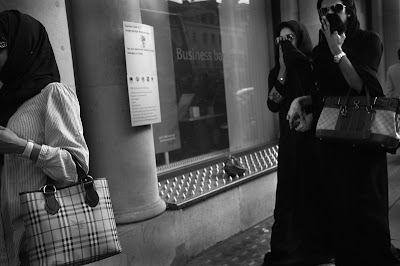
Point 3. Get in motion
Take a walk, and observe the passing scenery before you. Because you are now in motion, reality is quickly taking on another dimension, it becomes 3D in your mind’s eye. Your pace and your choice of lens will define a virtual bubble of space that you will encounter these ‘conjunctions’ and hence photograph them. Objects, people and scenes will flicker in and out of your space, and it will be at this moment that you begin to see photographs. I recommend a semi wide-angle lens, 35mm to 50mm is ideal, and pre-focus to 3m to get you real close to your subjects. If you have studied what the angle of view is a 35mm lens will cover at 3m, you will have these mindframes in your sight at all times.
Point 4. KISS !
Everybody asks me about equipment. So here goes. KISS! Keep-It-Simple-Stupid ! If you have just bought that brand spanking new D3X body with a super fast zoom lens that weighs 5lbs, then you will hate me. You might have arms the size of tree trunks to carry the monster but, you will surely annoy several, if not everyone you photograph because, discreet and anonymous, you are not. Stick to simple, light cameras with a short zooms, or fixed wide-angle lenses that let you concentrate less on settings, and more on the scene. Know your equipment well to avoid fumbling with Modes and settings etc. Don’t shoot and chimp. Chimping is the habitual act of looking at your LCD screen after every shot, which takes you away from your scene. Turn the auto review off! It will save on your batteries and you won’t look like a monkey! Chimp when you have finished a scene or when you are taking a rest.
Point 5. Be invisible!
Do not hang your camera like the ubiquitous tourist – round your neck. Firstly, you will stick out in the crowd. Wear it around your wrist with the strap. It would be more discreet and you will be ready to lift your camera to your eye in an instant. Walk with the flow of the crowd in a busy street but be prepared to retrace your steps if you spot something of interest. Be flexible with your shooting angles. By dropping to your knees, or crouching, you can alter the viewpoint instantly without too much effort. Blend into the scene by dressing in similar styles to the crowd.
Point 6. What to shoot?
The street throws up many layers of activities, often unseen by passers-by. Go off the main track and you will see more. Look out for anything unusual : human behaviour and stances, dress, hair styles, animals, colours, people in conversation, shopping bags, market activities, road signs, funny signs, store windows. Juxtapose the obvious with the interesting or its contrast. Watch for people at road junctions waiting to cross, at the bus stops, on the sidewalk cafes. There’s plenty of fodder for your camera. Remember to place the picture. This means that the photograph must show the environment and its subject. Its no use photographing an old coffee mug close up, better to show an elderly man drinking coffee in an old coffee shop.
Point 7. Tell a story
Link up your images to weave a storyline, however loose it might be. Once you have ‘locked on’ to a story, your images will begin to speak to you, and hopefully, your viewers. You may want to photograph specific stories like store keepers, street vendors, five foot way signs or old coffee shops in your town, or get a broader picture of urban life in the city, depicting subway users going to work, the rush of people in suits, or at a railway station.
Whatever it is, prepare your walk with your ‘point of departure’ in mind. This is a mental exercise and preparation to train how you see, without the inevitable added distractions. By fixing in your mind what are you going to photograph on your outing only, your ‘keep’ rate will increase without the burden of shooting everything that attracts you. Unlike photojournalists who have a brief to adhere to, you don’t, but you still need one.
Point 8. Editing
In all respects this is most crucial step in the whole process. After a day’s shoot, you would have gotten possibly several hundred images. How do you whittle them down? The obvious favourites will stand out and those can be picked off easily. Delete the truly awful, meaningless images that are out of focus, blurred and simply rubbish! Be brutal and honest.
You will be left with perhaps 3 categories: ‘great’, ‘maybe’, and ‘maybe maybe’. Keep them as they are and revisit them after a week or so. In each image there will be some element of the picture that you will find interesting, even in the ‘maybe maybe’ category. After all, you pointed your camera at the scene and clicked the shutter! You must have, consciously or sub-consciously recognised some gem, and took the shot.
After several gallivants in the street, you will have made a reasonably large collection of images, and you can begin to piece together a storyline or theme that links your best street photographs. Lastly, enjoy your shoot.
Go to Part 1


No comments:
Post a Comment